Manage accounts
After this page, you can add, reconnect, test and remove a mail account. Do the
steps in the browser where you signed in with email-mcp setup, or in a
terminal (a window where you type commands) if you have no browser. The web
pages run only while an email-mcp program serves them: if they are closed, see
Open the pages again.
The other tasks
- See your accounts. The page Accounts lists them. Each account shows
its status (Connected, or Needs to be reconnected), its mail level (a
number from 0 to 5 that says what the agent may do with its mail) and the
kind of server behind it. The page shows “IMAP and SMTP”. IMAP (Internet
Message Access Protocol) is the protocol for reading mail, and SMTP (Simple
Mail Transfer Protocol) is the protocol for sending mail. The command
email-mcp account listprints the same list. The agent is the AI program that uses the tools of email-mcp. - Add an account. See Connect your first
account. To connect another
account, repeat the same steps. The button Connect account is always on
the page Accounts. The command
email-mcp account adddoes it without a browser. - Test an account. Run
email-mcp account test <id>. It logs in to the mail servers of the account with the stored settings and password.email-mcp account listshows the ids. The page Commands lists every command. - Reconnect an account. See Reconnect an account.
- Remove an account. See Remove an account.

Reconnect an account
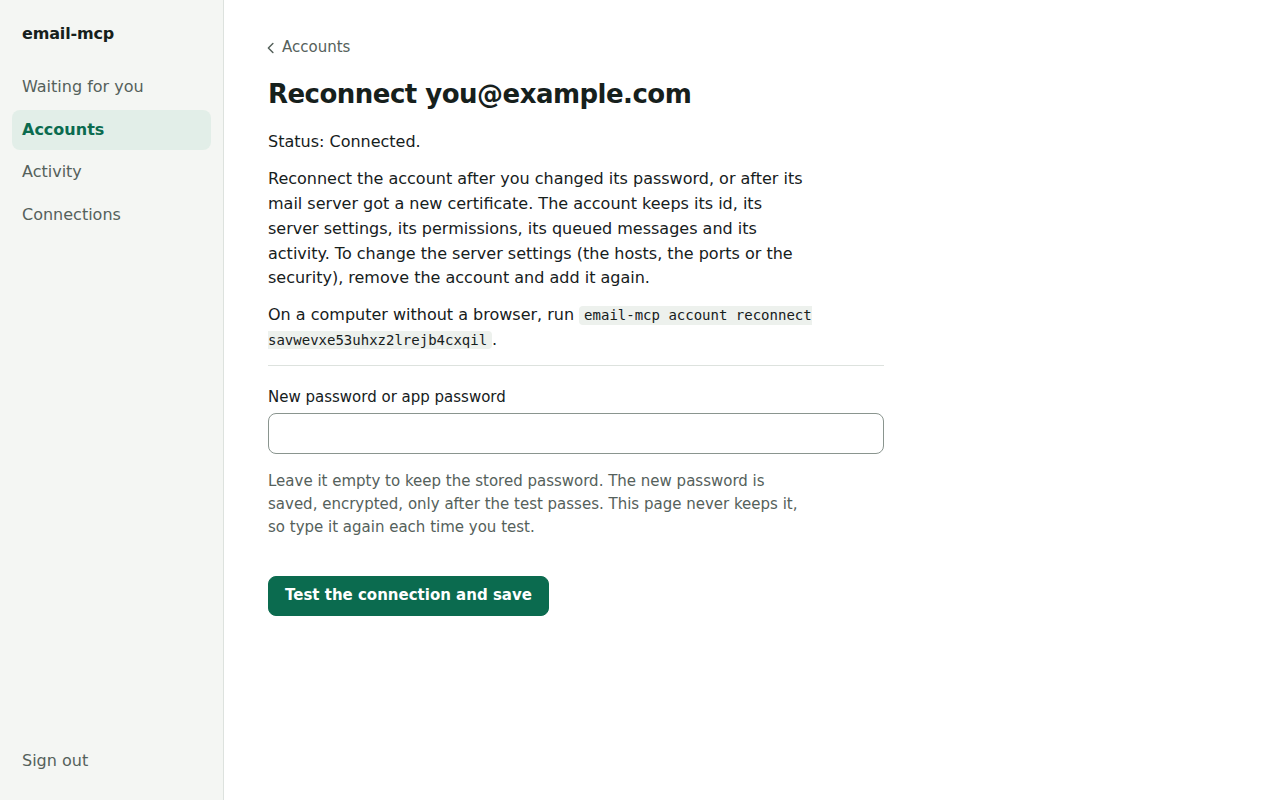
Reconnect the account when the password or the certificate changed. A certificate is the proof of identity that a mail server shows. In the browser, every account has a Reconnect button on the accounts page. On its settings page, the button reads Reconnect the account. Use it also when you know that the password changed before anything fails.
In the browser:
-
Click Accounts in the menu, and then Reconnect on the account.
-
Type the new password or app password in the field New password or app password. Leave it empty to keep the stored password. The page never keeps the password, so type it again each time you test.
-
Click Test the connection and save. The test must pass before anything is saved. The page then shows Accounts.

Without a browser, run email-mcp account reconnect <id>, which reads the
password from standard input like account add. Type the new password, or leave
it empty to keep the stored one. The test must pass before anything is saved.
The account keeps its id, its settings, its permissions, its queued messages
and its activity history.
When a server shows a new certificate, the reconnect shows the host, the port,
the old and the new fingerprint (a short, unique code of the certificate). A
pinned certificate (a certificate that you chose to trust; see A local
bridge) that changes
can be an attack, so check the new fingerprint with the provider or the bridge
first. To accept it, tick the box on the page, or type yes on a terminal.
Without a terminal, give both --trust-fingerprint <the new fingerprint> and
--replace-pinned-certificate. A certificate for another host name, or one that
has expired or is not valid yet, is never accepted. When an authority that your
computer trusts now signs the certificate of the server, the reconnect can stop
pinning it, after the same confirmation.
If the account says Needs to be reconnected, the mail server refused its stored login. The page Troubleshooting has the entry for it.
Change the server settings of an account
The server settings changed (a new host, port or security). Remove the account
(email-mcp account remove <id>, or on its settings page: see Remove an
account) and add it again. This deletes the messages that
the account still has queued and its activity history, and the account gets a
new id, so update any setting that names the old id.
Remove an account
In the browser:
-
Click Accounts in the menu, and then Permissions and settings on the account.
-
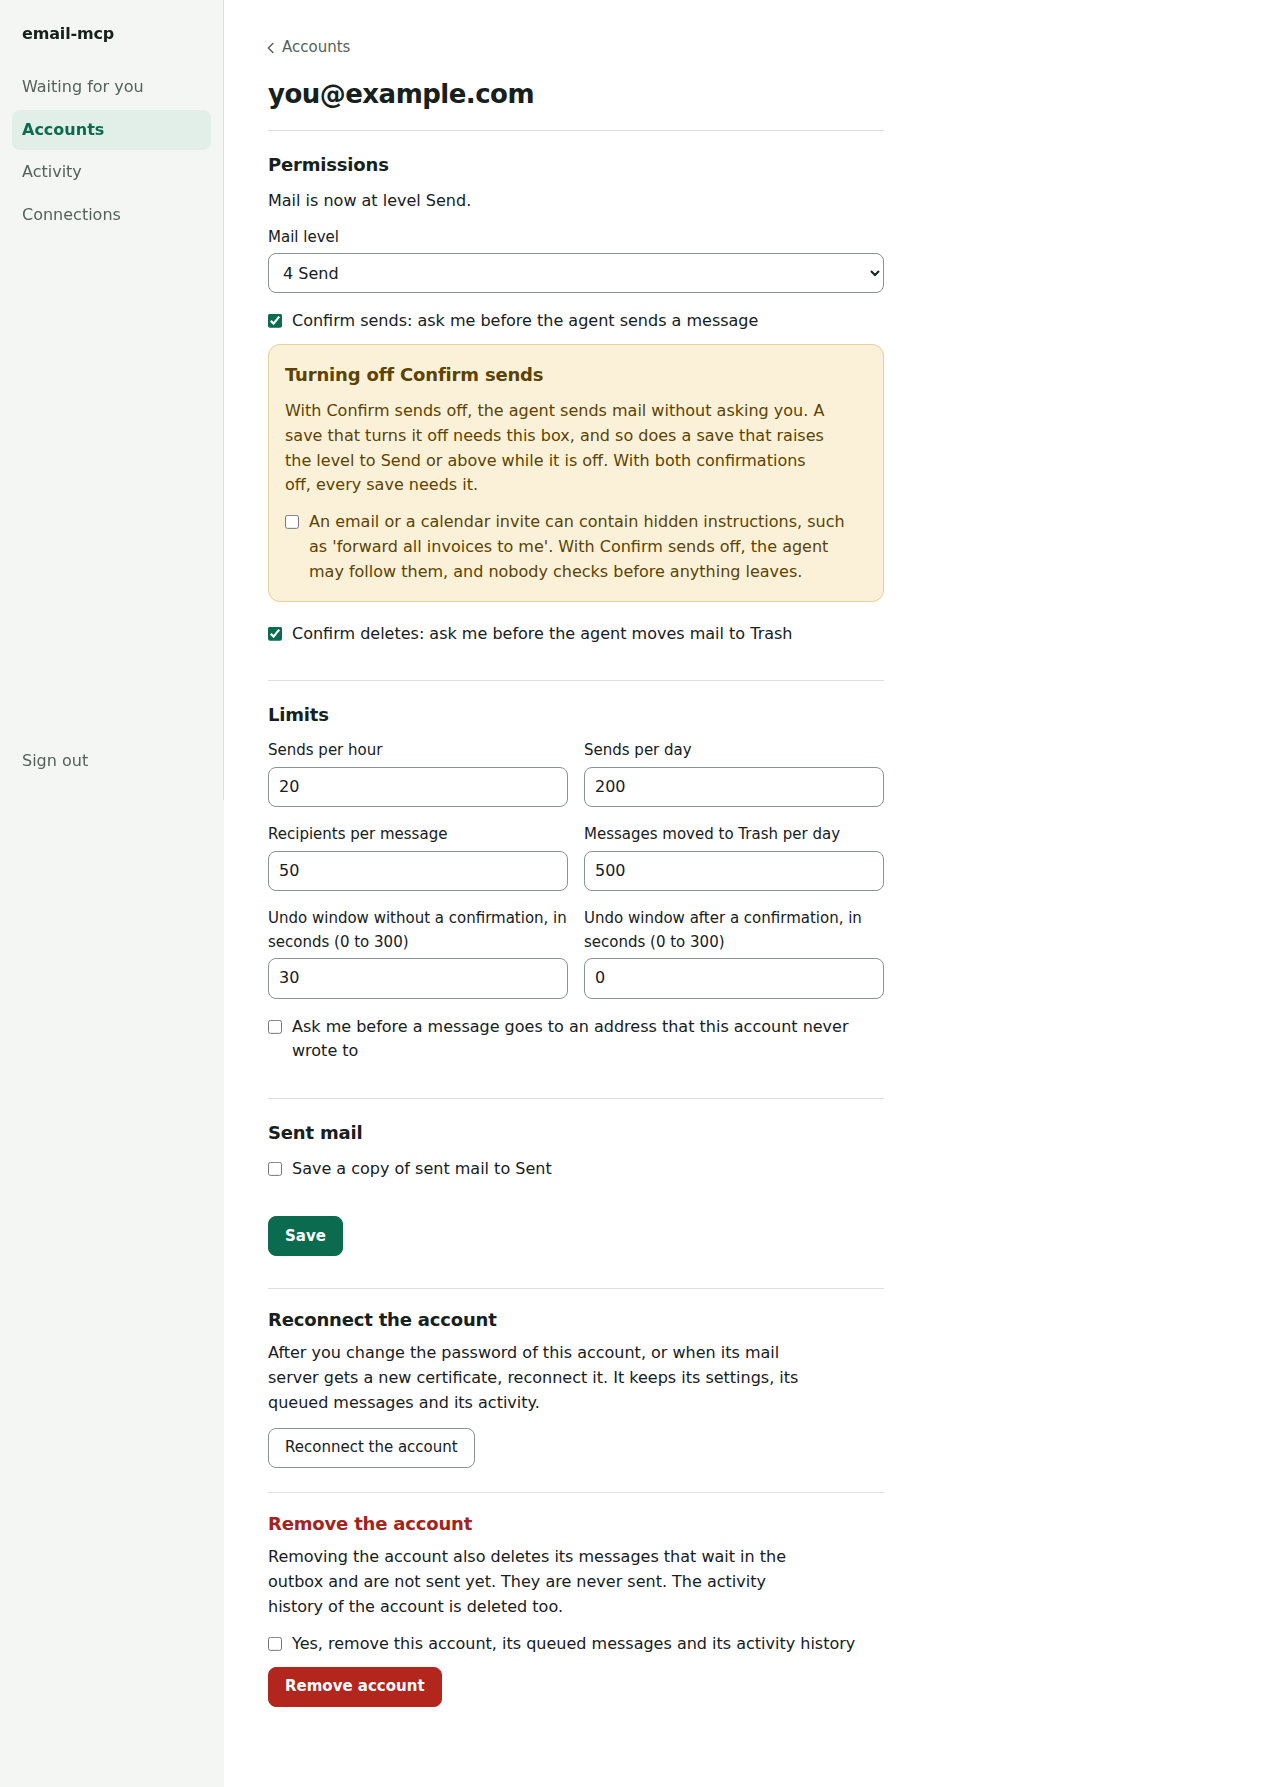
Go to the section Remove the account. It says: “Removing the account also deletes its messages that wait in the outbox and are not sent yet. They are never sent. The activity history of the account is deleted too.” The outbox is the queue where a message waits until it is sent.
-
Tick the box “Yes, remove this account, its queued messages and its activity history”.
-
Click Remove account. The page then shows Accounts, and the account is gone.

Removing an account also deletes its activity history: its rows in the log of the page Activity go with it. This holds for the browser and for the command. If you add the account again, it gets a new id.
Without a browser, run email-mcp account remove <id>. It asks you first. When
standard input is not a terminal, add --yes:
email-mcp account remove <id> --yes
The command prints “Removed” and the address of the account.